
Step 1: Cut Paper


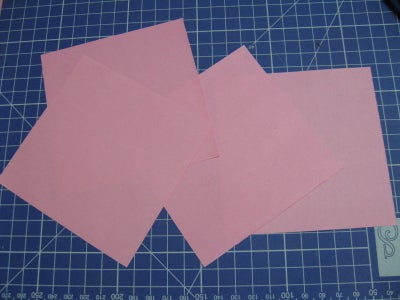
- We need 3 square pieces of paper for making one rose
- Take one A4 size craft paper and fold diagonally to make a square
- Trim and remove the excess. Now you can cut the left over square piece into four smaller pieces
- Take three of the smaller square pieces of paper for making rose
Step 2: Fold the Paper


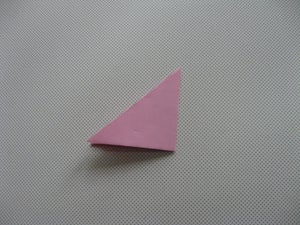
- Take one square piece of paper and fold it diagonally
- Make two more diagonal folds as shown
Step 3: Mark and Cut
- Mark a semi-circle as shown on the middle.
- Cut and remove the top portion
- Cut a small hole at the bottom
- Now open up the paper and you will have a flower shape with a hole at center


- Mark a semi-circle as shown on the middle.
- Cut and remove the top portion
- Cut a small hole at the bottom
- Now open up the paper and you will have a flower shape with a hole at center
Step 4: Cut Segments
- Take one flower shape, cut and remove one segment from it
- Take the second flower shape, cut and remove two segments from it
- Take the last flower shape, cut and remove three segments from it


- Take one flower shape, cut and remove one segment from it
- Take the second flower shape, cut and remove two segments from it
- Take the last flower shape, cut and remove three segments from it
Step 5: Curl Edges
- Using a plastic needle or a tooth pick, curl edges of all pieces outwards. Please see the curled pieces in the last picture.


- Using a plastic needle or a tooth pick, curl edges of all pieces outwards. Please see the curled pieces in the last picture.
Step 6: Glue Edges
- Take the first three larger pieces from which we cut and removed segments
- Apply glue on one segment, fold and glue the adjacent segment over the glued portion
- Apply glue on edges of other three smaller pieces we removed from the flower shape, roll and press
- Allow the glue to dry
Now we have all six pieces of the rose shapes as seen in last picture
Step 7: Arrange Petals and Glue
- Take the largest piece and place the second largest inside. Do not apply glue immediately
- Arrange all other glued pieces inside. Adjust each piece in a different manner to see how they can be glued to make look like real one
- Apply glue lightly and stick each piece separately
- Our Paper rose is ready. Please see the finished one in the picture above
You can make roses with different colored papers and arrange them in a flower vase with other real flowers and leaves.
NOW OUR ROSE IS READY ...
HOPE SO IT WAS USE FULL ......
LEAVE YOUR COMMENT ..


You can make roses with different colored papers and arrange them in a flower vase with other real flowers and leaves.
NOW OUR ROSE IS READY ...
HOPE SO IT WAS USE FULL ......
LEAVE YOUR COMMENT ..
Wow! It looks amazing. I would definately give a try.
ReplyDeleteThank you 🙂😄
Deleteamazing!! i will sure try it bestie!!!!!keep going!!!
ReplyDeleteThank you 🙂😄
DeleteNice. I will try this DIY Rose.
ReplyDeleteWay to go Dhakshita.
Keep rocking.
tysm
DeleteWOW!!!THANK YOU SO MUCH for sharing this !!!Very handy post !!!
ReplyDeleteKeep going . Waiting for ur next post :D
thanks a lot
DeleteWOW!!!THANK YOU SO MUCH for sharing this !!!Very handy post !!!
ReplyDeleteKeep going . Waiting for ur next post :D
Cute rose dhakki
ReplyDeleteI'll try it for sure
Keep going
Al the best
semma rose Dhaku. I did after seeing this but turned it down. it was totally wasted bcoz of my stupid work. waiting for your next post.......
ReplyDeletethank you avan . when i did first time the same thing happened to me .. u keep trying avan or call me let me teach ufor sure...
DeleteOh! This is so easy....
ReplyDeleteThanks Dhakshitha=)
It was very helpful to make a birthday card for my brother!!!
Waiting for your next blog....
thank u arrshia ..and wish u happy birthday
DeleteIt have been a long time. you have not posted yet. am waiting for your post.
ReplyDelete